The Silhouette Cameo machine is the most powerful crafting tool on the market, but the best thing is that it is easier to master than you might think. Whether you have just gotten your Silhouette Cameo or have owned it for a while but feel hesitant to start, this guide is here to help.
This guide includes every step-by-step tutorial to start cutting with your crafting machine. This stepwise guide will walk you through how to use Silhouette Cameo on your computer to create and then cut designs.
Here’s your step-by-step guide on how you can use your Silhouette Cameo machine:
Step 1 – Navigate to the Silhouette Store, where you will find resources and tools to create your perfect project.
Step 2 – Remove your machine from its box, then discard any tape and packing foam covering the lid and blade carriage. (A basic instruction manual is included to provide detailed instructions).
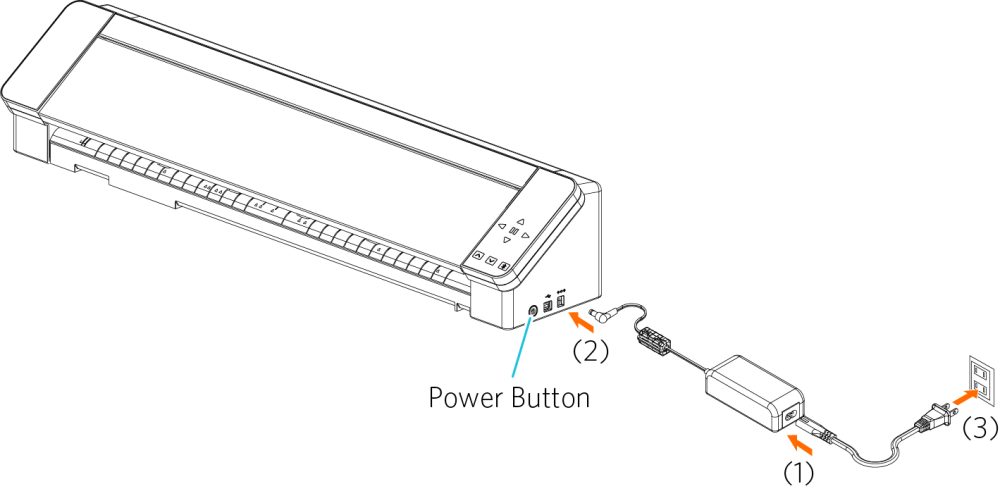
Step 3 – Plug the included ACadapter into both the wall and the right-hand side of the Silhouette Studio.
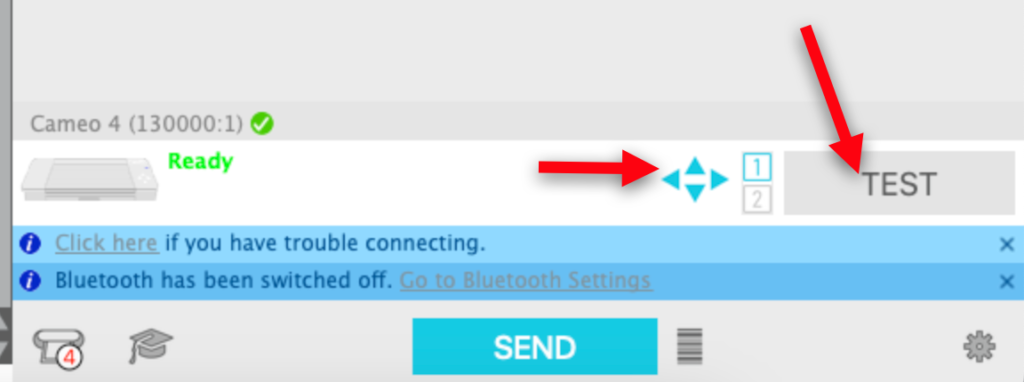
Step 4 – Use the included USB cable to connect your machine to your computer (or connect it via Bluetooth).

Step 5 – Turn on your machine by clicking on the power button for a few seconds).
Step 6 – Go through the initial setup screens to select your language and other options. The software allows you to create and cut unique designs.

Install and Launch the Silhouette Studio Software
To install the software, insert the software CD into your computer (your basic manual explains how to install the software on either a PC or a Mac once the software has been installed.
Step 1 – Open Silhouette Studio. When the software loads, you’ll see an adjustable 12 by 12-inch cutting area on the screen.
Step 2 – Start a simple project by clicking on the Text tool, then click on the cutting area and start typing; you can type and cut using any font on your computer.

Step 3 – Now you’re ready to cut, remove the liner from the cutting mat and place your material onto it.
Step 4 – Click the design page button in the design page panel.

Step 5 – Click and drag the reveal slider on the right-left to show or hide the software cutting mat. Revealing the cutting mat helps you know where to position your material on the actual cutting mat based on your design.
Preparing the Cutting Mat and Blade
You may be required to use a clean cotton cloth because the new Silhouette Cameo machine can be sticky before placing your material onto the mat.

Step 1 – On your design, lift the lid. You will use different blade depths to cut various materials as the software directs.
Step 2 -Unlock the blade holder, remove the blade, and place the blade into the adjustment socket so that the arrow on the socket lines up with the red line on the blade.
Step 3 – On the blade, rotate until the arrow on the adjustment socket points to the number three on the blade.
Step 4 – Now place the blade back into the blade holder and lock it into place.

Silhouette Cameo First Cut
To complete your first cut, you can take help from the following steps:
Step 1 – Align the left edge of your cutting mat with the blue guide marks. Ensure that the mat’s top is resetting against the white rollers. You can now automatically load your mat into the Cameo by tapping the load cut mat button on the software touchscreen.
Step 2 – Open the cut settings panel, and then you have to choose your material type.

Step 3 – Click on the Send to Silhouette button and then click on Start.
Step 4 – Once the Silhouette has finished cutting, tap the unload button on the touch screen to unload your cutting mat.
Step 5 – Now, you can remove your perfectly cut design.
Important Note: Use vinyl that has a nonstick backing.
If you want to help design your future projects, you can check Silhouette Studio, which contains thousands of tourney design quotes and patterns. Most of the designs are available for 99 cents. Click on the show online store button, create an account, and browse for your desired designs. Then, buy and download them to use them in your projects.