Silhouette Cameo 4 is a DIY crafting machine that allows you to make different crafts by cutting over 100 materials. Cameo 4 will enable you to cut materials like paper, fabric, vinyl, balsa wood, chipboard, leather, and many more, offering unlimited possibilities such as custom stickers, heat transfer decals, temporary tattoos, etc.
Silhouette Cameo 4 is a leading desktop cutting machine with Bluetooth connectivity, which eliminates the need for frequent manual connections. Plus, you don’t need to rely on power switches with this crafting machine.
Before you learn how to use Silhouette Cameo 4, you need to install the software first to enable the machine to cut.
How to Install Silhouette Studio Software?
The Silhouette Studio software is divided into four versions: The free basic edition, the paid designer edition, the paid designer edition plus, and finally, the paid business edition. You can further upgrade it to a higher version if required.
You can easily download the application onto your operating system with the following steps:
- First, you have to visit the Silhouette America website.
- Go to the “Software” section
- Select “Windows” and choose either Windows 64-bit or Mac 64-bit.

- Click Download, and after the download is complete, launch the software.
Important Note: Silhouette Cameo 4 can be used without an internet connection.
How to Use Silhouette Cameo 4 With or Without Mat?
To use a cutting machine with or without a mat, you need to access the “page setup” option in the design software, where you can choose to either select a cutting mat size or choose “NONE” to cut directly without a mat.

When to Use a Mat
For delicate materials, thin paper, or intricate designs where precise placement is crucial, using a cutting mat is recommended.
When to Cut Without a Mat
Cutting directly on the machine’s rollers is perfect for thicker materials like adhesive vinyl or cardstock and for getting a faster workflow.
How to Do Cut Settings When Cutting With Mat
The Silhouette Cameo 4 has three main cutting types: regular with a mat, kiss cutting (matless for materials with a backing), and pop-out cutting (matless for paper and cardstock).
Step 1: Adjust Cut Settings
To start adjusting your cut settings, follow the steps given below:
- Navigate to the Send tab to edit cut settings.
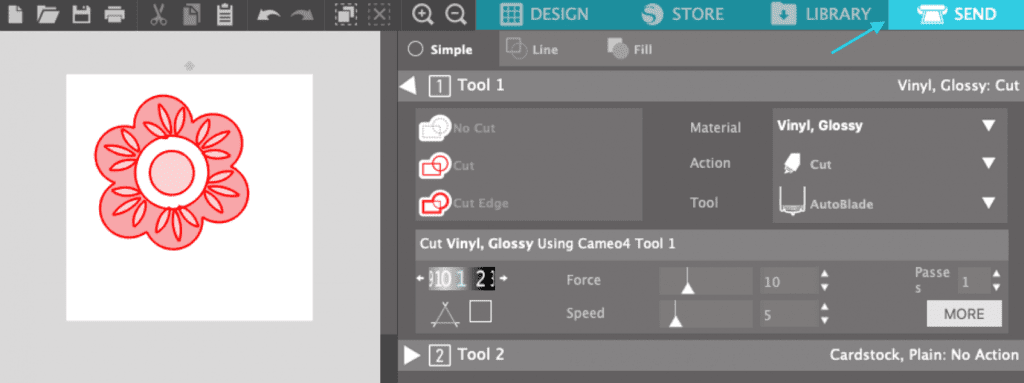
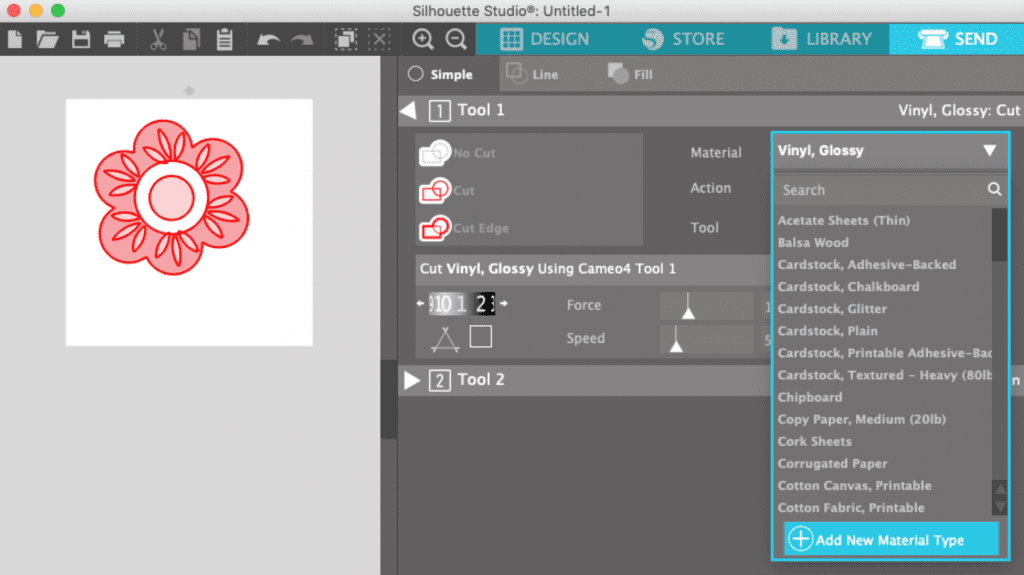
- Choose your material from the pop-up list.
- Now, select Action and the tool. The Action and tool will be auto-detected, but if they are incorrect, you can change them.
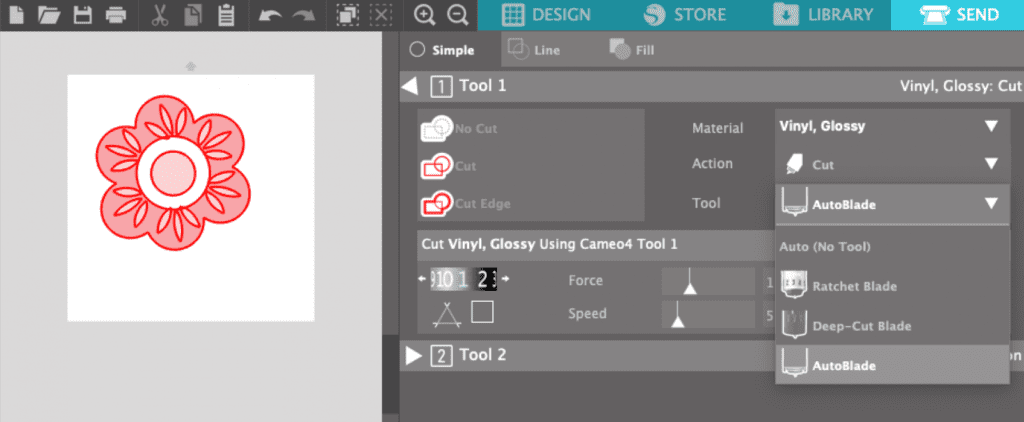
The cut settings will change to the selected material, Action, and tool accordingly. If you’re manually using a blade that requires further adjustments, change it to the required size and put it back into the machine.
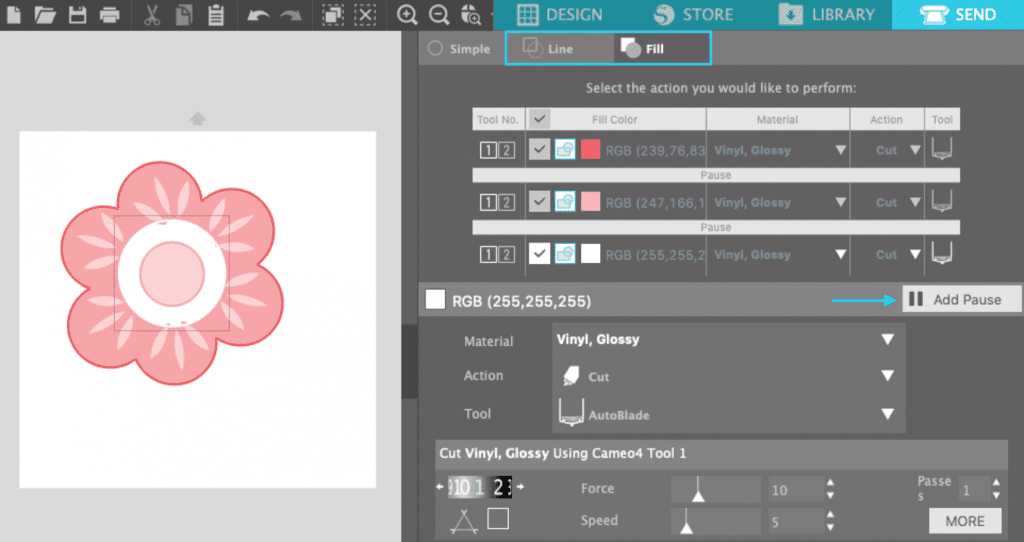
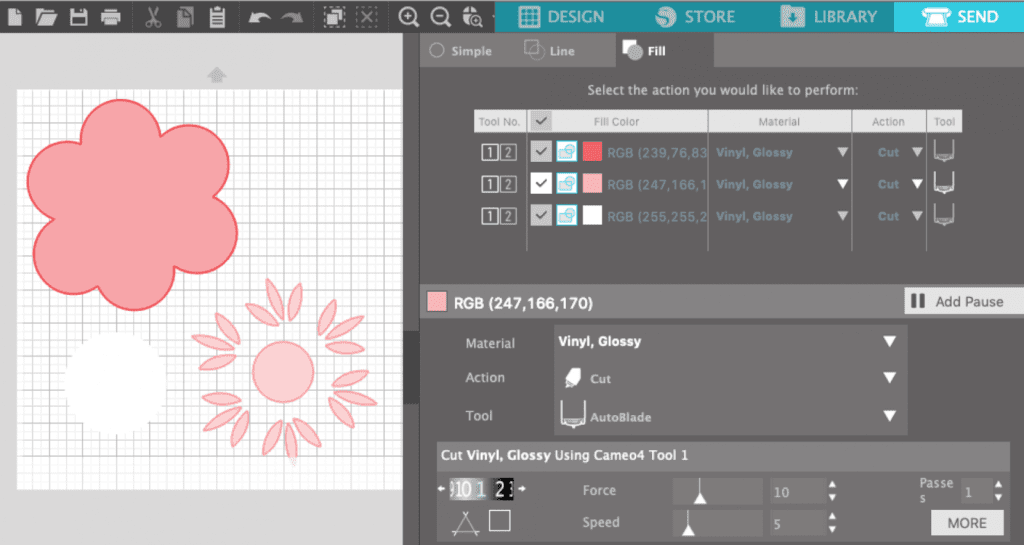
Step 2: Cut by Line or Fill
This is one of the most useful steps if the design consists of more than one color or type of material. Do the following steps:
- In the Send section, click the line tab.
- Each line or fill color (respectively) will be displayed in the list.
- Double-check the materials and actions for each color.
- Now, to cut each color separately, add a pause for each color. It will help move the material more easily.
- Once the machine does the cutting with the first loaded color, it will automatically pause.
- Then switch the color you want to and load it into the machine
- Click to resume and repeat with each color you select.
If you want to cut all your pieces in one go, place the materials on the mat and match the colors in Silhouette Studio.
How to Load Your Silhouette Cameo
Cameo 4 rollers come with a mat that is 12 inches long. However, you can change them based on the width of your project if required. Ensure that the machine is securely held by the machine’s rollers. Adjust your rollers by releasing the lock lever on the right-hand side and then re-lock the lever again.
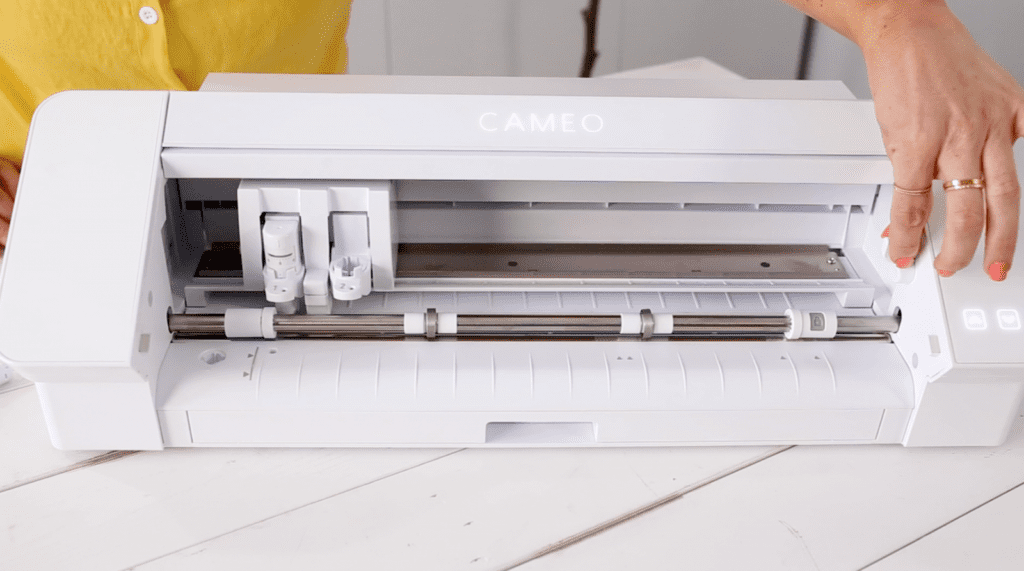
While Using a Cutting Mat
To load your material into the machine while using a cutting mat, follow the following instructions:
- First, place your material on the top of the Mat to match the Silhouette Studio grid.
- Now, try loading your cutting mat or material, and then try to align the material with the load line indicator on your left side and place it.
- Ensure you’ve placed the mat or material against the roller.
- You can finally press the load arrow.
Send Cut Job
It is often recommended to do a test cut to make sure your settings are correct before sending a cut job.
- Click the Test button.
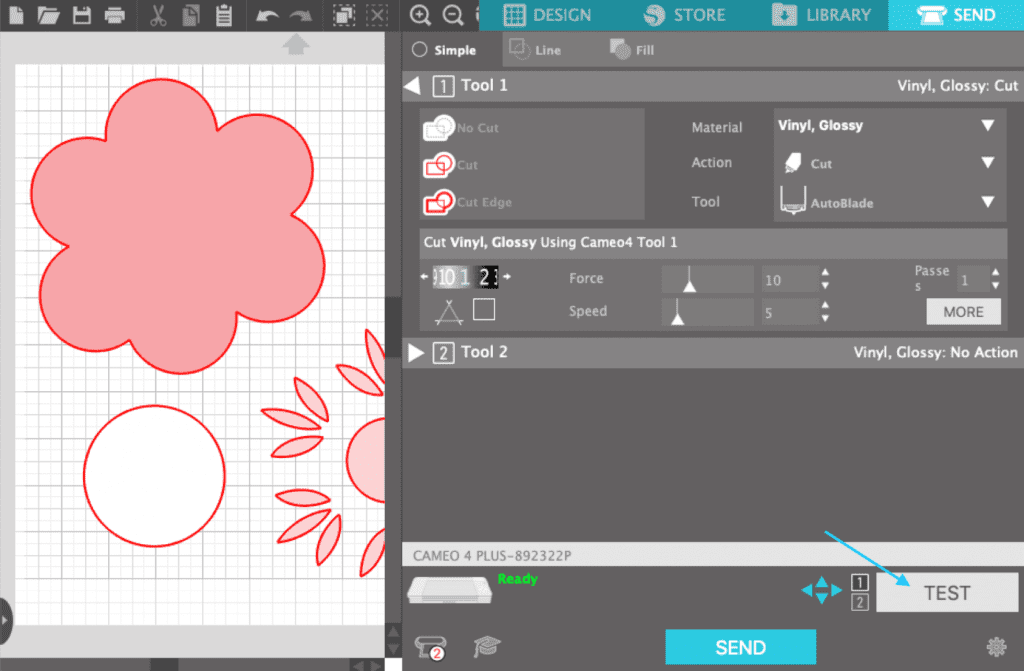
- At the left top corner, the machine will display the cutting shapes. Unload your material if it needs further adjustments. Then, again load the machine.
- Select the Send button to start the cut job. Once you’re done, tap the down/unload arrow button.
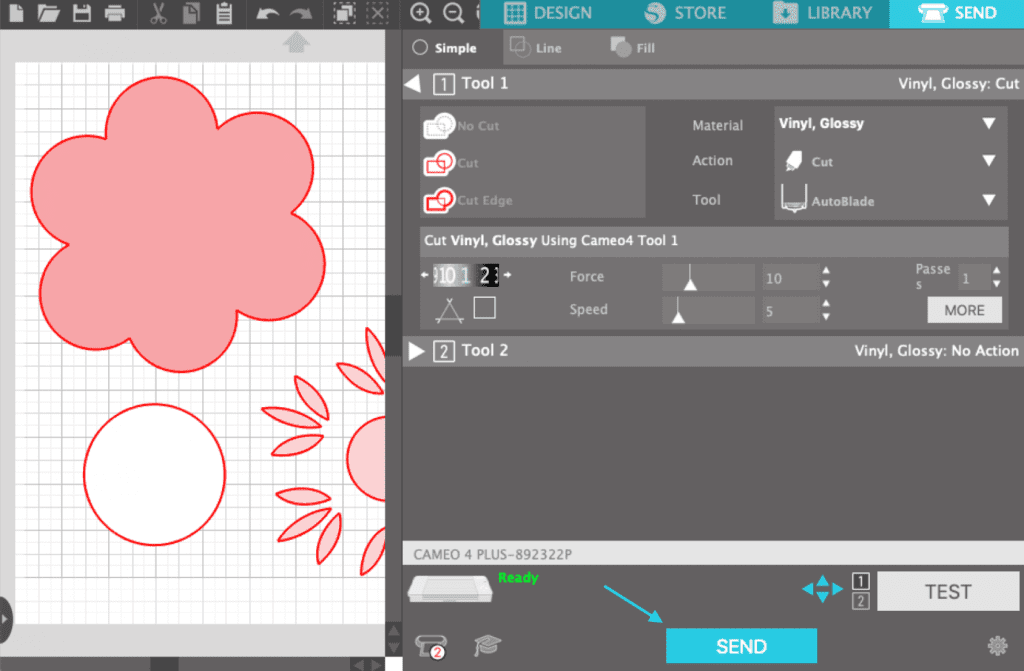
Congratulations! Your design has been successfully cut.
Frequently Asked Questions (FAQs)
How Do I Transfer an Image to Silhouette?
To transfer an image to Silhouette, you can follow these steps:
- Open Silhouette Studio.
- Select the file you want to open.
- Navigate to the image file you want to transfer
- Select the trace area and stretch a rectangle around the image you want to use
- Adjust the high pass filter until all the black areas are selected.
- Press trace, move the original image out of the way, and delete it.
What App Turns Pictures Into Silhouette?
Several apps can turn pictures into Silhouette, including:
- Silhouette Maker: It can automatically turn photos into silhouettes and includes effects to add color, sparkle, and natural elements to your designs.
- YouCam Perfect: It’s a free photo editing app that lets you create your photos in just a few steps. This includes templates, backgrounds, and frames to enhance your photos. All you have to do is choose your background, cut out your portrait, and adjust your image quality to darken it into Silhouette.
- Canva: You can use the duotone effect in Canva to turn a photo into a Silhouette.
How Do You Load Fonts Into Silhouette Studio?
To load fonts into the software, you can follow the steps given below:
- Download the font on your system first.
- Restart your design software.
- In the right sidebar, click the Text Style tool.
- The new font will appear in alphabetical order in the font list.
You can use either Open Type (OTF) or True Type (TTF) fonts in Silhouette Studio. OTF is the more modern file type.