Silhouette Cameo 4 is a reliable and versatile cutting machine. It is suitable for both personal and professional use. Silhouette Cameo 4 allows you to cut out or sketch on a number of materials, including vinyl, cardstock, fabric, and more.
If you have bought a new Silhouette Cameo 4 and do not know how to set it up. Don’t worry, you are not alone. Many people encounter several issues, like a lost Bluetooth connection, cutting settings, or blade calibration, when setting up their Silhouette Cameo 4.
Setting Up Your Silhouette Cameo 4
Setting up Silhouette Cameo 4 is a simple and straightforward process. In this guide, we will show you “How to Setup Silhouette Cameo 4“. We have covered everything in this guide, from unboxing to connecting your Silhouette Cameo 4 to your desktop.
So, without wasting your time, let’s proceed to the process of setting up your Silhouette Cameo 4 cutting machine.
Steps to Setup Silhouette Cameo 4
In order to setup Silhouette Cameo 4, please follow the steps below:
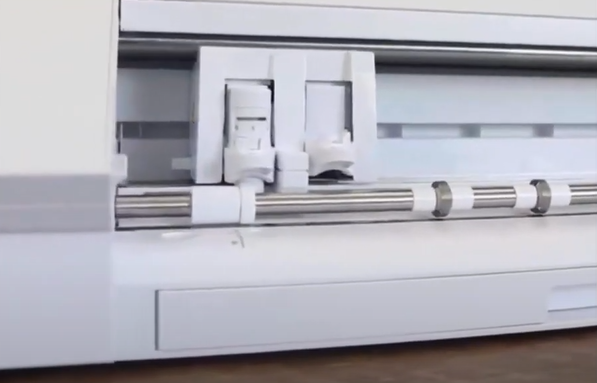
Step 1: Carefully take the Silhouette Cameo 4 out of the box, and then remove all tape and packing materials.
Step 2: Open your favorite web browser (e.g., Chrome and Safari) and visit the official Silhouette America website.
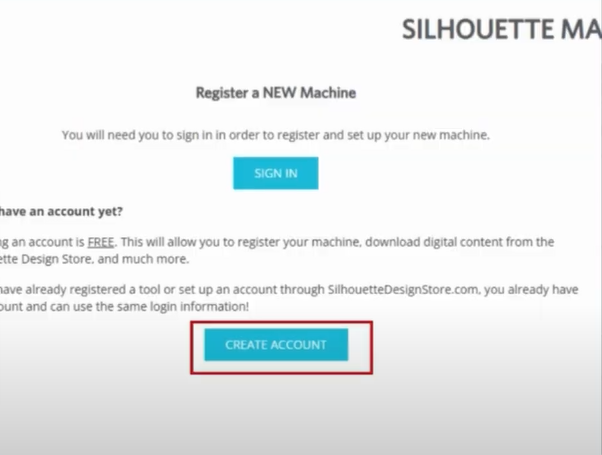
Step 3: Then click on the Register Machine option on the navigation bar.
Step 4: Next, click on the Create Account button. Note: Skip this step if you already have an account.
Step 5: Now, a form will appear on the screen. Fill in all the information, enter the Captcha code, and click on Create an Account button.
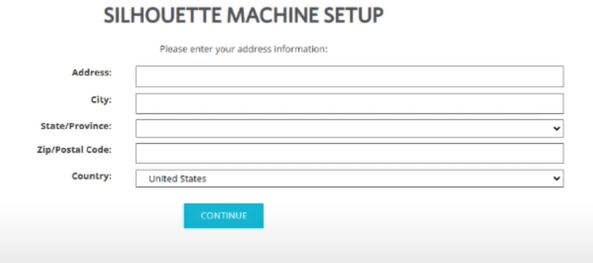
Step 6: After creating your account, provide your address information and then click on the Continue button.
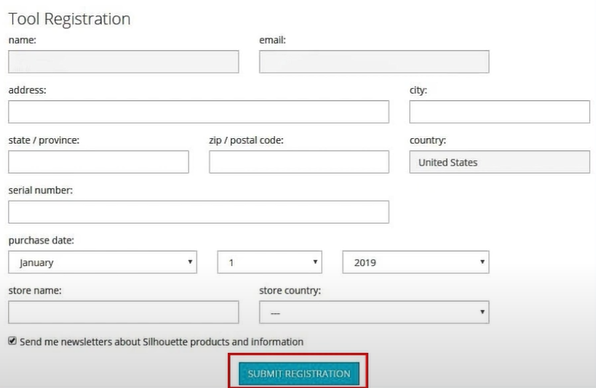
Step 7: After that, register your machine by entering the serial number, the purchase date, and from where you purchased it. Then click on the Submit Registration button.
Step 8: Now, go to the official Silhouette Software page.
Step 9: Select your Operating System under the Silhouette Studio drop-down.
Step 10: Then confirm that you’re not a robot, and click on the Download button.
Step 11: Open the downloaded file and click the Next button showing on the Welcome screen.
Step 12: Click the Next button again and then click the Install button. After that, the file will start installing.
Step 13: Once the installation is done, you will see Completing the Silhouette Studio Setup Wizard screen. Then click the Finish button.
Step 14: Next, plug the power cable into your Silhouette Cameo 4 machine.
Step 15: Then connect the machine to your computer using a USB cable.
Step 16: Turn on the machine, open it, and insert the Cameo 4 blade.
Step 17: Open Silhouette Studio and start designing.
Congratulations! You have now completed all the steps to setup Silhouette Cameo 4.
Conclusion
You have now completed all the steps to setup your Silhouette Cameo 4 Machine. We hope you find the above steps useful.
Silhouette Cameo 4 is a powerful cutting machine. It allows you to cut a large number of materials. Setting up your Silhouette Cameo 4 Machine is easy. By following the steps mentioned above, you will be able to setup Silhouette Cameo 4 cutting machine quickly.
Thank you for reading this post. Please stay connected with us for more tips and guides to make the most of your Silhouette Cameo 4 machine.
If you are unable to setup Silhouette Cameo 4, please feel free to reach out to us. Our experts are here to guide you through every step of the process to help you setup your Silhouette Machine.
Frequently Asked Questions (FAQs)
Why Is My Silhouette Not Connecting to My Computer?
Learn how to connect your Silhouette machine to the computer, follow the given steps:
- Unplug all the cords from the silhouette machine, including the one to the wall outlet and the power bank in the middle of the cord.
- Power is being turned off to the USB port.
- Reinstall your USB port drivers after uninstalling them.
How Do I Log Into My Silhouette Studio?
Learn how to log in to the Silhouette Studio Application, you will have to follow the steps below:
- Go to the Silhouette America website.
- After that, click on the Sign In button.
- Enter your username and password.
You can create one for free if you don’t have an account. After signing up, you’ll receive an email to verify your account. You must use the link in the email to activate your account.
If you need help activating your account, contact Silhouette support at @silhouetteamerica.com.
How Do I Transfer an Image to Silhouette?
Learn How to transfer an image to Silhouette, you can follow these steps:
- Open Silhouette Studio Software.
- Select the file you want to open.
- Navigate to the image file you want to transfer.
- Select the trace area and stretch a rectangle around the image you want to use.
- Adjust the high pass filter until all the black areas are selected.
- Press trace, move the original image out of the way, and delete it.