You have just unboxed your new Silhouette Cameo machine and placed it next to your laptop. You are already thinking about making stickers, banners, or a custom gift today. You plug it in, open the ‘Silhouette Studio app’, and wait – but nothing shows up. At this point, most of the people pause and wonder if the cable is faulty, if Bluetooth needs to be turned on, or if they missed a step. This moment comes up a lot in craft groups and online chats, where users say they spent more time trying to connect the machine than actually using it.
If this sounds familiar, then you’re in the right place. Connecting a Silhouette Cameo to a laptop is simple once you know which steps to follow and which option works best for you. This guide will guide you through USB and Bluetooth connections using easy steps. Take it one step at a time, and you will have your cutting machine connected and ready to start your first craft project without stress or second-guessing.
Things to Check Before Connecting
Before you connect your Silhouette Cameo to a Windows or Mac laptop, make sure a few basics are in place to avoid setup issues.
- First, check the power. Plug the cutting machine into an electrical outlet and turn it on.
- If you are using a USB connection, then use a good-quality cable and try a different port if required.
- For wireless setup, turn on Bluetooth on your laptop and press the Bluetooth button on the machine until the light flashes blue.
- Next, you have to confirm your laptop is ready.
- Install the latest Silhouette Studio, then check for any updates, and make sure your Windows/Mac system meets the basic software requirements.
How to Download & Install Silhouette Studio on your Laptop
Learn ‘how to connect your Cameo to a laptop‘, you will need the ‘Silhouette Studio App‘. This software lets your laptop communicate with the cutting machine. The steps in the section below will help you download and install it on Windows and Mac.
Downloading
- First of all, visit the official Silhouette America website and open the Software page.
- After that, you have to choose the Silhouette Studio option and click the Download button that matches your computer’s operating system, either Windows or Mac.
- You don’t need to buy any upgrades to use the basic software; upgrades are optional and only add extra features.
- Once you click download, wait for the file to finish downloading.
Windows

Mac

Installing on Windows
- After the download is complete, open your browser’s download list by pressing Ctrl + J keys on your keyboard.
- Find the software file you just downloaded and click on it.

- When prompted, select the Run button and follow the on-screen instructions.

- The setup will walk you through each step of the installation.
- Once it’s finished, open the Silhouette Studio app from your Windows computer or Start menu.
Installing on Mac
- When the download finishes on a Mac system, find the file in the Downloads folder.
- Click twice on the software file to open it, and drag the Silhouette icon into the Applications folder icon.

- Let the installation complete, and open the software from the Applications folder to get started.

- Once installed, your laptop is ready to connect with the Cameo cutting machine.
Steps to Connect Silhouette Cameo Using a USB Cable
After installing the Silhouette app, it’s time to connect your machine to your laptop with the help of a USB cable.
- Turn off your machine and unplug the USB cable from the machine and your laptop.
- Take a standard printer-style USB cable and plug the square end into the port on the machine.
- Next, connect the flat end to your laptop, avoiding using USB hubs or adapters, as they can cause connection issues.
- Afterward, turn on the Cameo and open the app on your laptop.
- Go to the Send panel, click the machine icon at the bottom, and select your model from the given list.
- Once connected, the status should show Ready, which means the USB connection is working properly.
If the machine doesn’t show as ready, restart the Cameo and the software, then check the cable connection again.
Steps to Connect Silhouette Cameo via Bluetooth
Here are the steps to connect your machine to a laptop using Bluetooth, which lets you cut wirelessly without a USB cable.
On Silhouette Cameo
- Firstly, plug in your machine and turn it on.
- Press the ‘Bluetooth button‘ on the machine’s control panel until the light turns solid blue.
On Your Windows or Mac
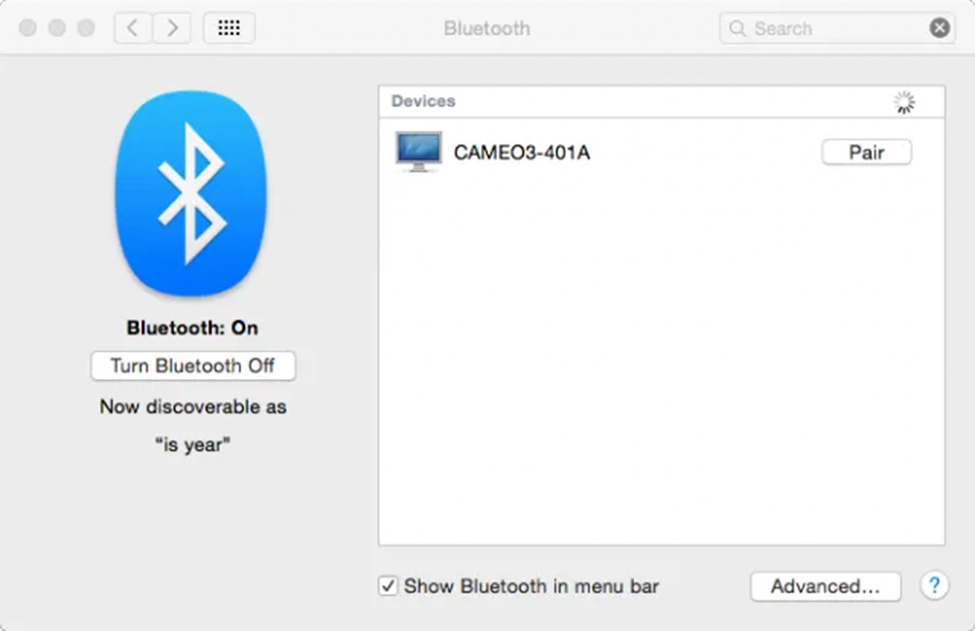
- Next, open Bluetooth settings on your laptop.
- On Windows, go to Settings > Bluetooth & devices.
- On a Mac, open System Settings or System Preferences and select Bluetooth.
- Make sure Bluetooth is on, then look for your machine name in the list of available devices.

- After this, click the Pair button and wait until the status shows it’s connected.
In Silhouette Studio
- Now, you have to open Silhouette Studio and navigate to the Send panel.
- Click the machine icon at the bottom and select your machine from the list.
- Once everything is done, the status will show a Ready message, which confirms that your Cameo is linked with Bluetooth and ready to use.
Steps to Setup the Cutting Machine in Silhouette Studio
Once your Silhouette Cameo is linked to your laptop, the next step is to set it up in the Silhouette app. This makes sure the app recognizes your machine and is ready to cut.
- To get started, open the Silhouette Studio app on your laptop.
- Go to the Send panel and look at the bottom of the screen for the machine icon.
- After that, click on it and select your Cameo name from the list.
- When the connection works properly, the status will update to Ready.
- Next, check that the correct machine model is selected, especially if you have used a different machine before.
- Also, you can confirm settings like mat size, material type, and blade options based on what you’re working on.
- Once everything looks correct, your Cameo is fully set up in the app and ready to start cutting projects.
Frequently Asked Questions (FAQs)
How Do I Connect My Silhouette Cameo using Bluetooth?
Learn “How to Connect your Silhouette Cameo” with the help of Bluetooth, turn on the machine and then press the Bluetooth button until it starts flashing a blue light. On your operating system, enable Bluetooth connection and pair with your crafting machine from device settings. Once it’s done, you will need to open the Silhouette Studio software, then navigate to the Send panel, select your machine model, and verify it shows as ready before cutting.
How to Add Silhouette Cameo to a New Laptop?
Learn ‘how to add silhouette Cameo machine to a new laptop’, install the latest Silhouette Studio app. Turn on the machine and connect it using a ‘USB’ or ‘Bluetooth’. In case you are using Bluetooth, then pair the machine with your laptop in its settings. Open the app, go to the Send panel, select your Silhouette machine model, and rescan to connect.
How Do I Add My Silhouette Cameo to My Computer?
Follow the instructions given below to add a machine to your computer:
- You have to visit Silhouette’s official website https://www.silhouetteamerica.com/.
- Click the More Info button under the Silhouette Studio logo.
- Select Windows 64-bit or Windows 32-bit, depending on your computer.
- Press Download and then open the downloaded file.
- Follow the installation prompts.
- Launch the Silhouette Studio program.
That’s it: the Silhouette crafting machine will be added to your computer.
What are the System Requirements for Silhouette Design Studio?
Currently, the software is a Desktop-only application for Windows & Mac. The minimum system requirements needed to support the software include:
- Operating System: Windows: 8.1-Windows 11 & Mac: OS 11 or upgraded.
- Broadband Connectivity: Strongly recommended for regular updates and access to Design Studio. Internet connectivity to activate a license key for upgrading.
- RAM: 4GB.
- Processor: 2 GHz or faster processor speed.
- Memory: 2 GB hard disk space.
- USB Port: USB 2.0 Port or higher.